There are many ways to install a WordPress theme, we are going to proceed through the different scenarios here.
To begin with, you will need to ensure that you are logged into your Themeforest account. Once this is done, navigate to the downloads section where you can now download the theme zip file. Here you can either download:
i) All Files and documentation
ii) Installable WordPress file only
In order to quickly install the theme, select the option “Installable WordPress file only”:
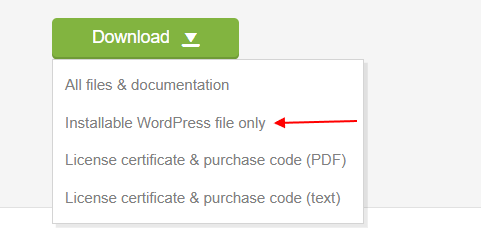
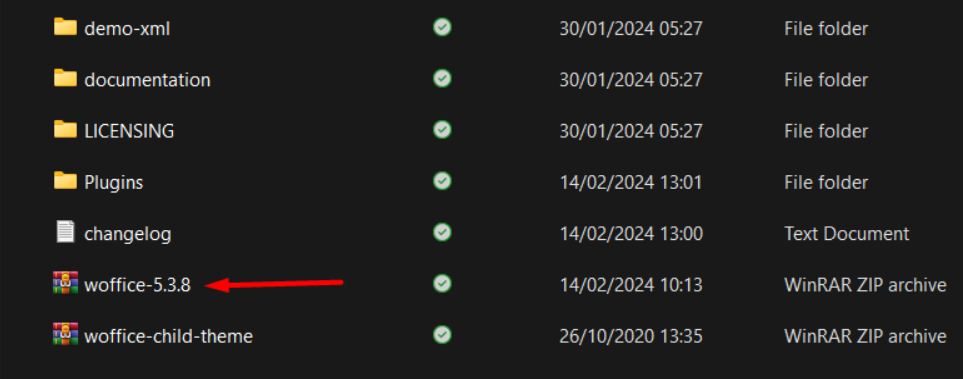
If however you download “All files & documentation”, the downloaded zip file will be named “Woffice-Intranet-Full-Package.zip“. You should not install this zip file. Instead, you will need to extract this zip file and in it, you will find the installable theme zip file named using the convention woffice.<version>.zip .
Installation via the WordPress Dashboard
1. Login into your fresh WordPress installation
2. Within the WordPress dashboard, navigate to the Appearance > Themes > Add New
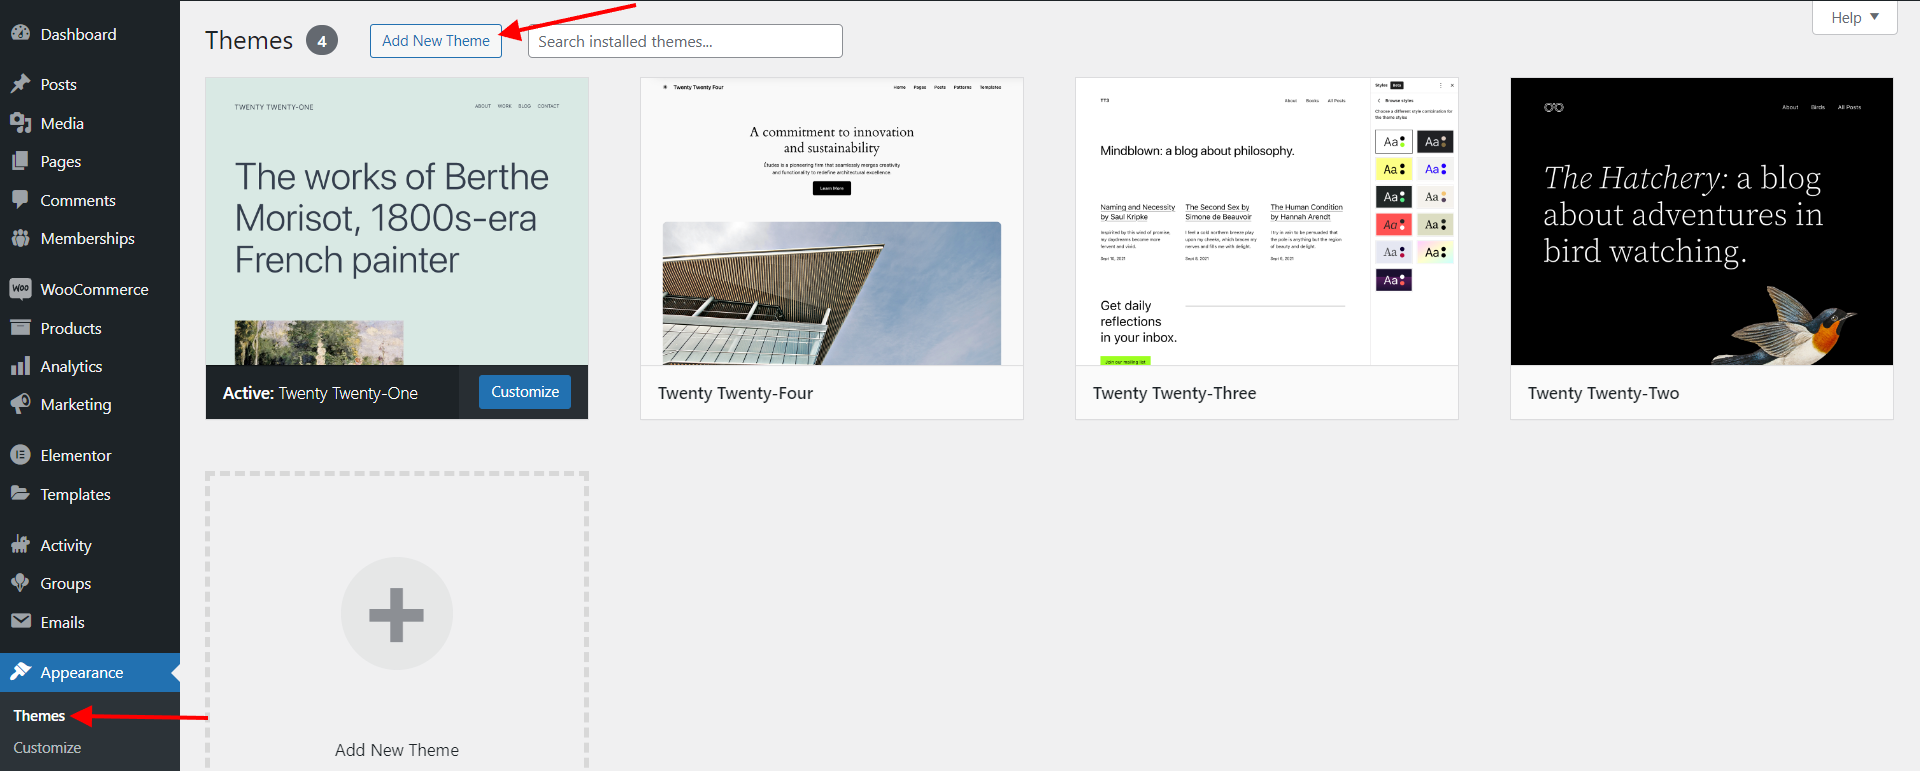
3. Click to the “Upload Theme” button
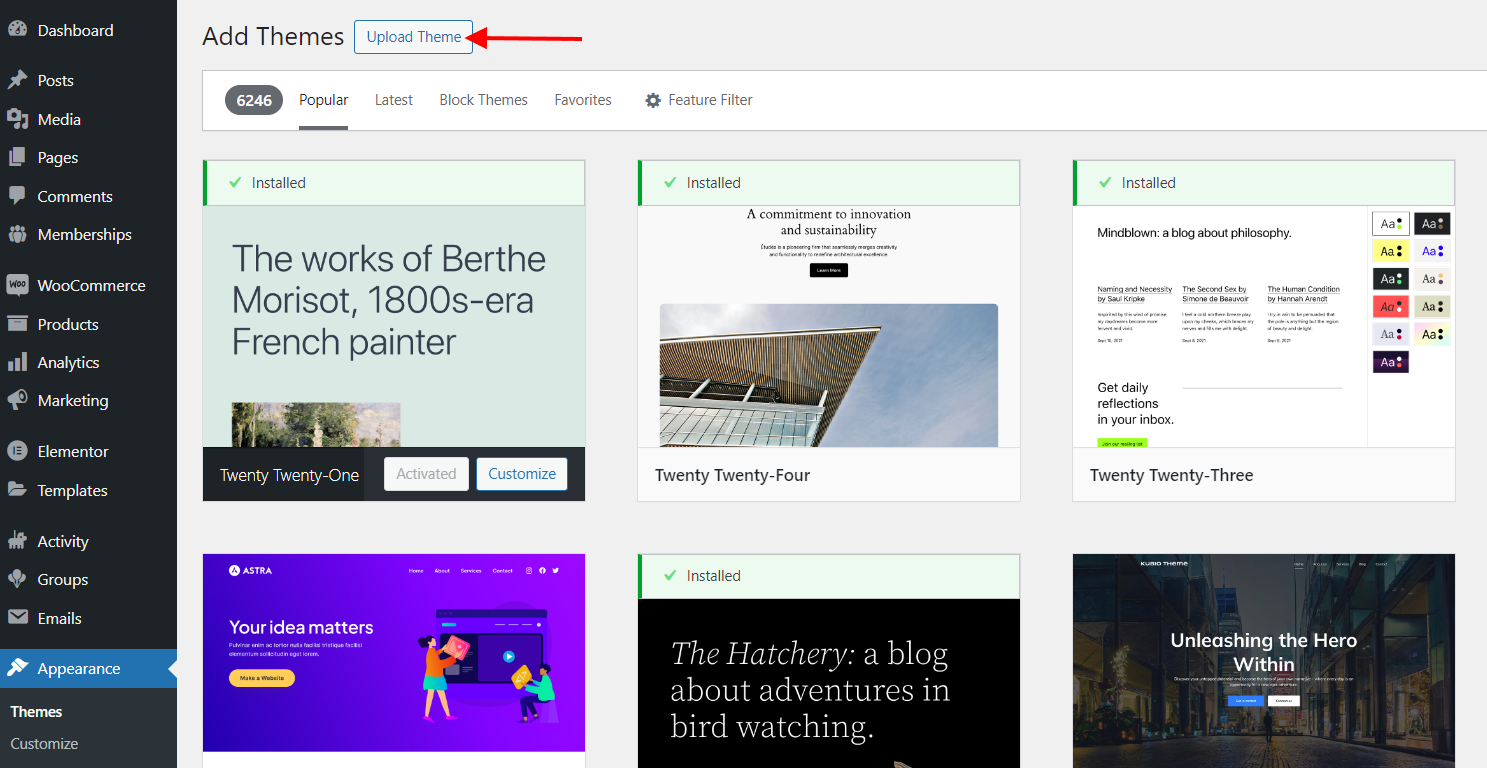
4. Click “Choose file” to open your computer’s file explorer

5. Select the woffice.<version>.zip file downloaded from Themeforest. The version is changing on every new release.
Upload trouble?
The upload might fail. Usually, it is due to a max upload size set on your sever’s configuration. But it could happen for some other reasons. No problem, checkout the “Manual Installation” below.
6. Click the “Activate” link.

7. A notice will show up on your screen, click “Being installing plugins”.
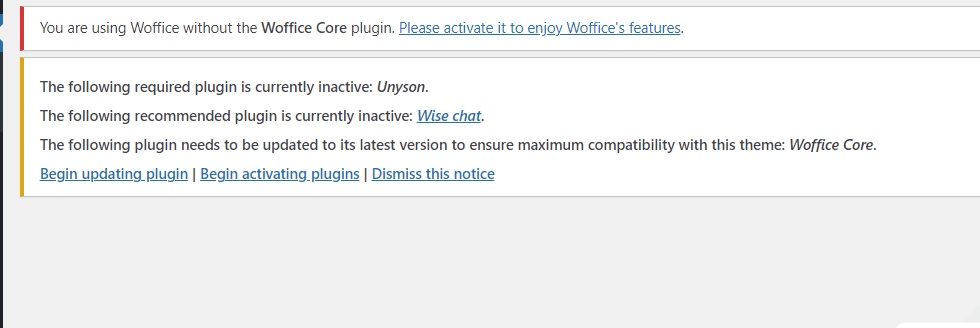
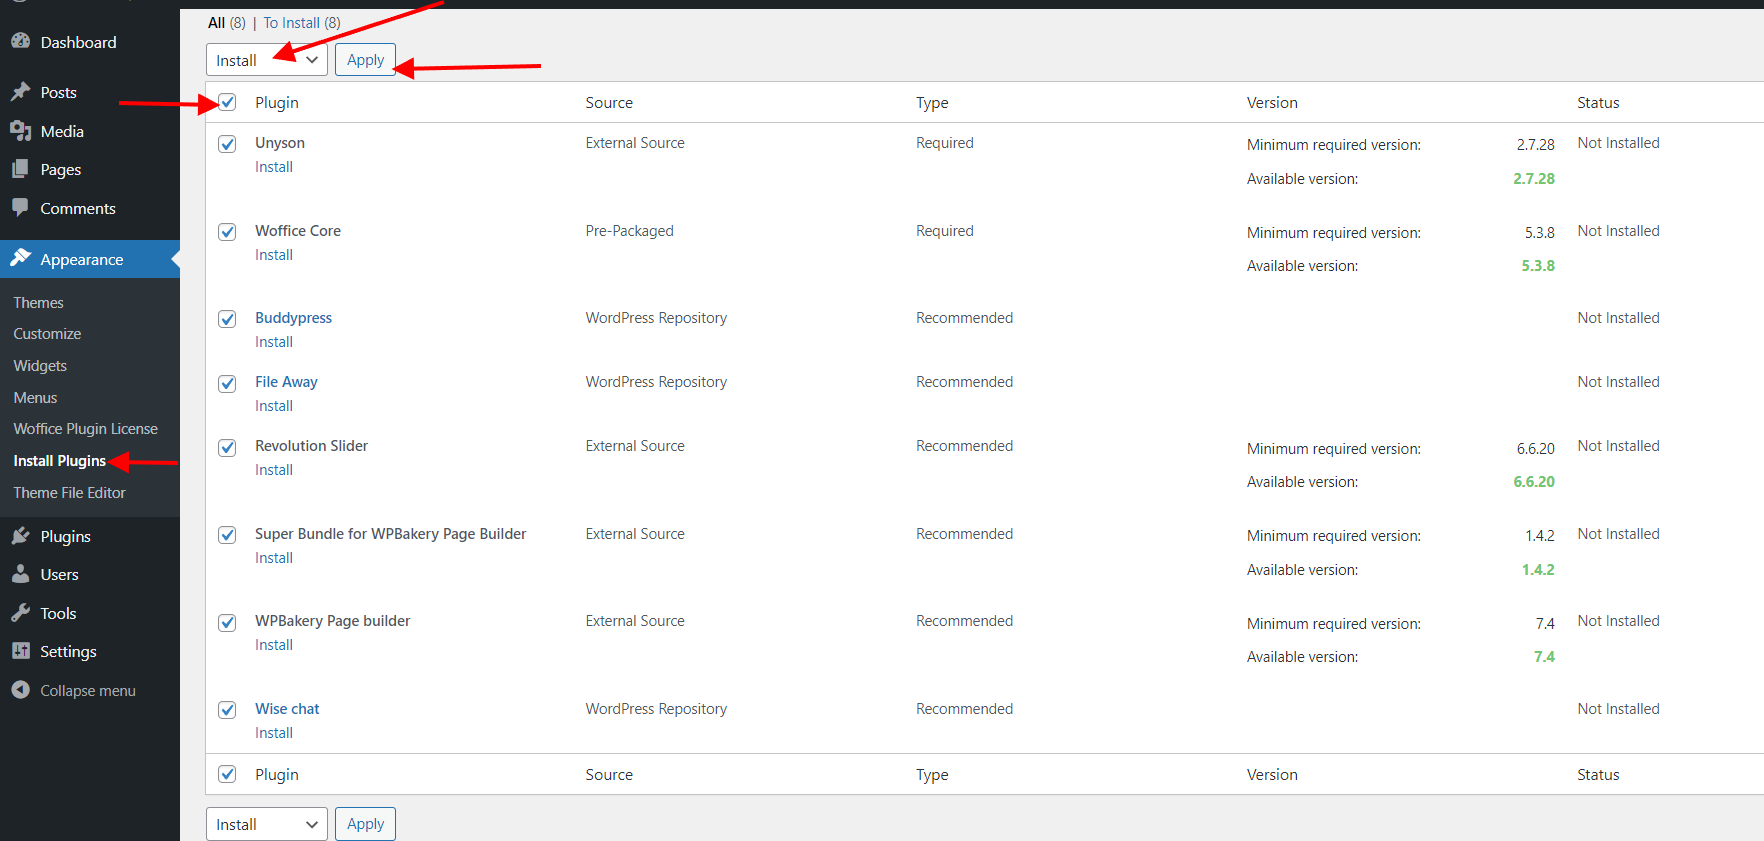
8. Woffice requires Woffice Core plugin and we also highly recommend BuddyPress. The rest depends on your own use.
Make sure to install and activate them. You can always come back later to this step. Appearance > Install plugins.
Install all the plugins in 2 clicks:
9. Go to Settings > Permalinks and make sure the Post name option is selected.
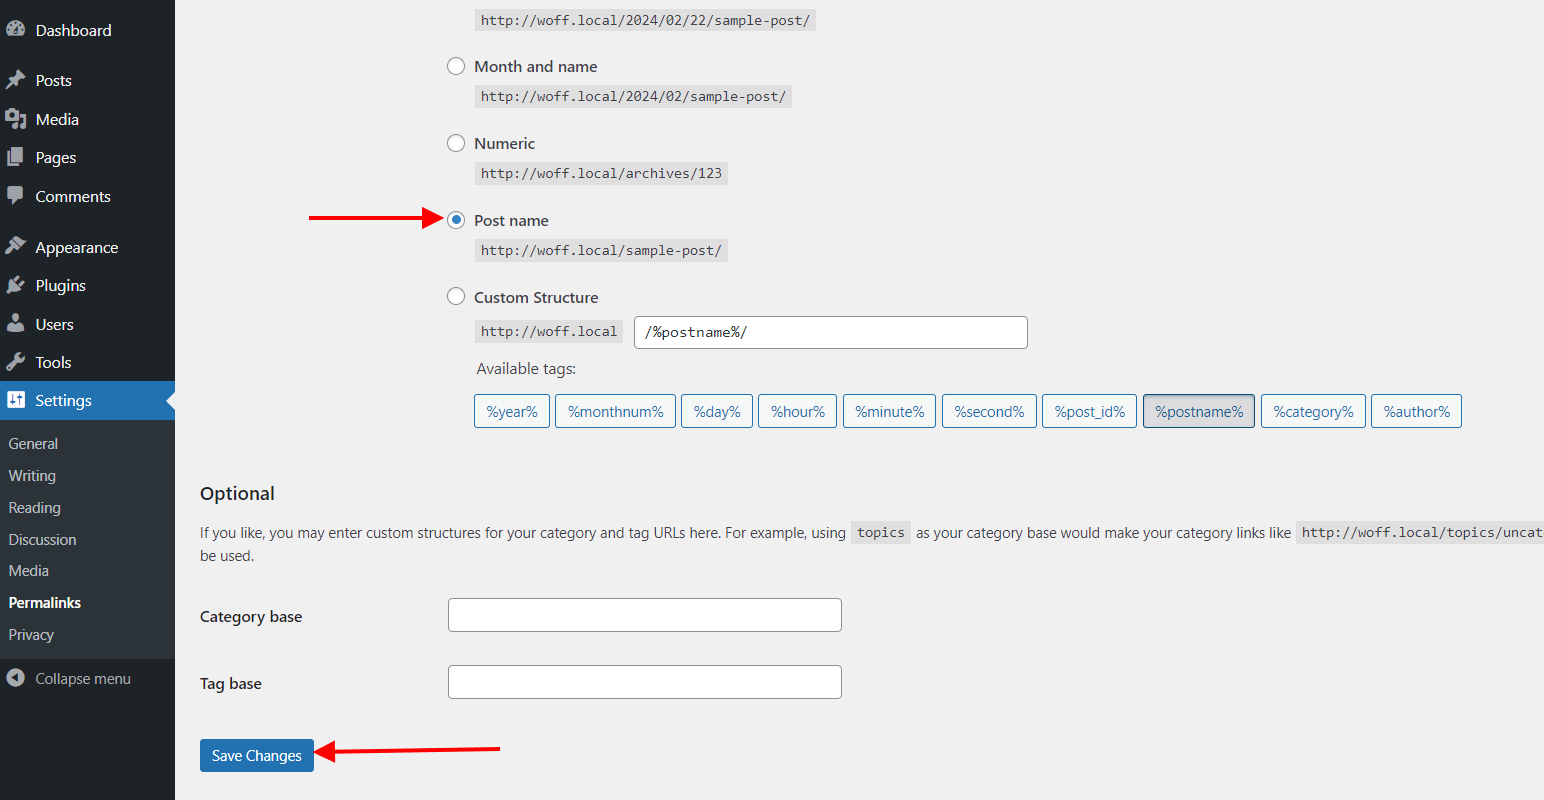
Without this option most of your pages will return 404 errors.
You are all set!
Multisite installation (MU)
The Multisite installation is working, but it is a bit more tricky because no plugin will be installed for you by default.
Indeed, the plugin installer is not working on Multisite installations.
- Follow the “Step by step set up” above up to step 6.
- Go to Plugins > Add New > Search for “Unyson“, install and activate it.
- Go to Plugins > Add New > Search for “BuddyPress“, install and activate it.
- To install any bundled plugin from Woffice (such as: Revolution slider, Dp Pro Event, WP Page Builder, EventON…..)
You need to go in the Woffice Main package file (available from your Downloads page on Themeforest), plugins.zip. You will see many .zip files. They are all ready-to-be-installed WordPress plugins.
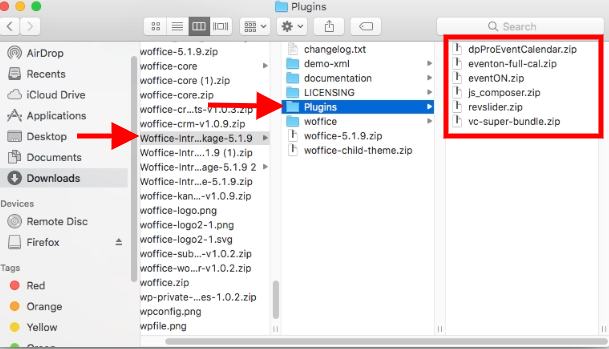
As for the Woffice Core plugin, you can find it within the Woffice > inc directory path
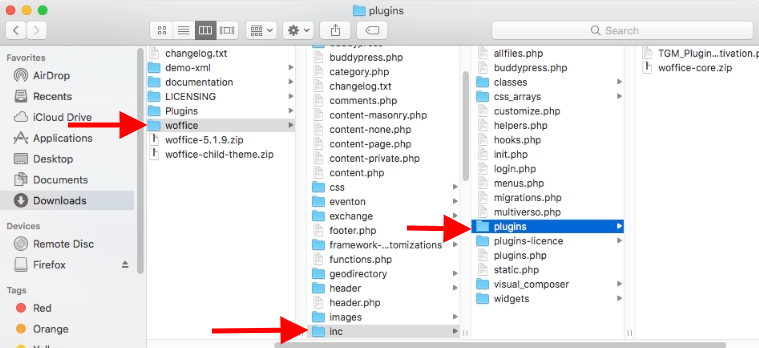
5. Go to Plugins > Add New > Upload (official documentation for more details) and upload the plugins.
In Manual installation
If for some reason you cannot upload the Woffice theme through the WordPress Themes page.
Well, you can always upload it manually, which is in fact faster. Using a FTP client.
What is a FTP client?
A FTP client lets you browse through your server’s file as a file explorer. You can download and upload files from your computer to your server.
We invite you to read this tutorial.
- Connect to your server by FTP
- Go to wp-content/themes/
- Upload woffice.<version>.zip
- Unzip it there, you should have wp-content/themes/woffice/
- Go to Appearance > Themes > Woffice > Activate
- Follow the step by step guide above from step 7.


